Tuesday 30 September 2014

Iceland in Autumn - Meeting Iceland

Hello I thought I would share with you some of my Iceland trip, especially the wonderful landscape but also a little bit about the wildlife and history too. I have quite a few photos to share with you.

The tour I went on was subtitled 'Icebergs, Glaciers, & Waterfalls' so if going to use that roughly to divide my blog posts. It will be in fact: 

-Meeting Iceland (first impressions and sights, this blog post)
-At the End of the Rainbow (Waterfalls, waterfalls, waterfalls!)
-Land of Fire.. (Geysers, mudpots and vast lava fields)
-..and Ice (Glaciers and Icebergs)

I also have ' What's that blur' for a little bird id quiz. Some photos were just quick snaps just to see what the birds were, so it'll make for a more challenging quiz and I think that can be more helpful for identification skills than close detailed shots. I will also enclose a list of the widlife we saw on the trip at the end. This will be the last of the Iceland blogs though.

The blog itself isn't in exact order of what I did as I've grouped similar subject matter and though I've checked some of the information I might have gotten some it wrong but it is what I heard at the time. Anyway to Iceland!

Part 1

Meeting Iceland

On first reaching Iceland it was clear the landscape was completely different to what we have in the southeast of England. It was largely treeless with only a few stunted trees and shrubs in places as the land still hasn't recovered from being heavily deforested and grazed from the time of the Vikings. The ground was black and rocky as if someone had crumpled it up and scattered some extra rocks from the sky for a little extra topping.

The roads were quiet, the landscape empty.  A few low-rise summer houses and farms were scattered and isolated in the landscape but they were few and far between. Some were wrapped in a cardigan of turf to help keep them warm. The sparse vegetation was grazed by sheep and the Icelandic horses, still retaining their historical bloodline from the time of the Vikings making them prized across the world. They have a unique gait, the tölt, which is like a fast walking pace, and comfortable for the rider.

As we moved towards the mountains the ground began to show its volcanic origins and was bulged and cracked from tectonic activity. The weather was cold and wet when we arrived which hid the tops of the peaks in mist. In fact the whole landscape was saturated. Water pooled and streams through valleys crystal clear and poured out from the mountains everywhere you look like a leaky barrel.

We visited Ϸingvellir, the site of the first parliament of Iceland set up in 930CE. There the chieftains met at the logberg or lawrock to discuss and agree laws. This continued until 1271 when Iceland became part of the Norwegian crown. The Commonwealth continued until 1662 when the Icelandic people became subject to the absolute rule of the Danish king.
We sat to have our lunch beside the waterfall Öxaráfoss trying to avoid the misty spray. The water flows into the largest natural lake in Iceland where the crystal clear waters make it popular with scuba divers. Once we finished we began to walk around the park accompanied by a raven flying overhead cronking along the rocky outcrop . Ϸingvellir sits on the mid-Atlantic ridge that divides the Eurasian and North American tectonic plates across the middle of Iceland. Here a dark streak can be seen slashing across the rocky landscape marking the edge of the European plate.
We only had a brief glimpse of the northern lights during our stay owing to the overcast and rainy weather that dominated our holiday. This was a faint blur that extended above the black clouds, like a smudge in the sky. At times it grew brighter expanding into a bar of vertical streaks. It glowed and faded a few times like a fire trying to light before finally the cloud cover drew a curtain over for the rest of the night.
Nevertheless there was still plenty left to see as we headed towards some Iceland's most iconic waterfalls..

..more to come!

Monday 22 September 2014

Winter Fox Painting - Finished!

Part 8 of my painting and the final stage.

Sorry it's a little later than stated. I have just arrived back from Iceland and my timing was a little off.

Regardless here are the final couple of changes and the completed painting.

I've worked a lot more into the snow of the foreground, trying to add some lightness and texture to it. I've also added a couple of holly branches over the fox with some more snow to help 'sit' the fox into the painting better and lifted the height of the snow at the fox's tail.

As I work, and at the end of the painting, a trick I find useful is to hold up the painting to a mirror and look at its reflection, or alternatively scan a photo in and flip the image. This is useful to see if any elements look off as your brain can find these hard to perceive after looking at the same image for so long.

Once done, I signed and dated the painting. I hope you like it!

Title: A Winter's Day


Friday 19 September 2014

Work in Progress: Winter Fox Part 7

Not that much left to go now.


I add some fine darker details onto the fox's body and tail as well as some highlights but I largely work on the snow.

Using light bluey and pink whites I add these into the foreground and softly blend whilst trying to leave areas of more dishevelled snow and shadows. The more bluey and brighter tones of the foreground snow compliment the reflections in the fox's eyes and body and provide contrast against the darker background.

Part 8 coming Saturday.

Thursday 18 September 2014

Work in Progress: Winter Fox Part 6

It's time for Part 6 of my Winter Fox painting. I suggest checking out the previous stages if you haven't already seen them this week.

Alright.. ready?

Here we go!

Now we're really going to bring in the winter sun and add bright white details to the brush and honey warmth to the body of the fox. But before that it's time to finish the head by adding the last of the fur around the cheek and the last whiskers in the shadow.


Using my finest brush I add littke fur details in the body along with broader sweeps of colour onto the hind leg. I did omit the details of a couple of holly leaves until now on the left-most twig so have filled them in.

I've also started on the foreground. It's just going to be of snow so I've added a mixture of dark blue and purpley tones in the shadowy areas so I can start adding the lighter tones later.

See you Friday for the next step!

Wednesday 17 September 2014

Work in Progress: Winter Fox Part 5

More furring today. 


I've done some more fur details on the face but have largely been working on the lighter colours of the body. Oddly enough the lighter colours in the tail will actually probably end up more shadow as the tail will be in bright light. I've brought in more golden tones to the fur towards the middle (again another bright area) and added some small highlights into the dark fur.

I think it's time to start thinking about the foreground.


Tuesday 16 September 2014

Work in Progress: Winter Fox Part 4

Here is Part 4 of my winter fox painting. Make sure to have a look at the previous stages of this painting on my blog as you follow me paint.

Now the time for furring and and adding highlights has come!


I've added some darker base tones to the brush making sure to work in the direction of the fur. As well as this I've also added the very darkest lines and areas of fur at the back of the fox. The biggest change has been the highlights on the face though. Adding the white, yellow, and blue highlights to the eyes helps bring them to life. And the brighter touches on the nose and highlights on the whiskers let you know that the fox has its nose in the sun. Here's a close up:


I've also worked on the fur details of the face and ears also the left side of the fox's face (that's on our right) is still relatively untouched. I try to make sure to work on areas that will be overlapped first (such as the jaw before the tail fur) to avoid awkward mark-making and keep things a little more natural.

Part 5 tomorrow.

Monday 15 September 2014

Work in Progress: Winter Fox Part 3

Welcome to Part 3 of the Winter Fox painting. Make sure to check out Part 1 and 2 to catch up to now.

Now that the fox has been roughed out we can start to work on some of the dark areas and make the fox more opaque.


As well as working on some of the darks of the eyes, ears, and nose I've also worked a little on the fur edges that overlap the background. I've let some of the leaves fall in front and behind the fox but I'm probably going to introduce a new branch to 'tuck' the fox in. I've also added some lighter touches to the fox's brush and some base colours for a few whiskers.

A lot of dark colours have been added towards the back and rear of the fox as these areas will sit in shadow with the front in much brighter light. I've also added the snow onto the leaves behind.

In Part 4 we'll build up the fur and add the highlight colours into the eyes and face so they really 'pop'.

More to come Tuesday.

Sunday 14 September 2014

Work in Progress: Winter Fox Part 2

Welcome to part 2 of my Winter Fox painting! 

I'm working on a title. 

If you haven't seen part 1 make sure to scroll down to check that out or use the links to the side so you can see how the painting has already progressed.


So now that the holly and ivy has been roughed out I work in some of the details into it such as the shadows and veins and not forgetting the reflections as holly leaves are pretty glossy as well as the berries.


After that we finally get to work on the fox. Hurrah! I'm using the paint pretty thin here to position elements of the painting as well as the general flow of the fur. You can also see some blues and greys have been added onto the leaves and berries, this is to be the base for some snow that still remains caught in the bush. I also did a lighter wash on to the ivy leaves to blend the veins in more.


Stay tuned for the next update tomorrow!

Thursday 11 September 2014

Work in Progress - Winter fox painting Part 1

I thought I would share with you guys the current wildlife painting I am working on. It has a bit of a wintry theme going on. I'm pleased with how it is turning out so far and think it would make some nice little Christmassy (sorry I said the word!) prints. I hope to be able to do this in the near future with this painting as well as some other works but I'm not sure whether I'm going to use photos I take myself, invest in some more photography gear (ie lights), or see if I can find someone to take the photos.

As I am going on a little holiday to Iceland I thought that I would schedule stages of the painting to go up on my blog whilst I am away so you can see the painting progress. So from Sunday expect Part 2 and subsequent daily updates every morning!


Okay let's get started:

First, I wanted to create a wintery painting but I wasn't sure what animal to create a painting of. I decided against a robin as they are so overused but still wanted an animal that would fit nicely into a winter environment. One of my first ideas was to create a painting of a pair of bramblings - winter migrants to the UK in our colder months.. but I thought people would prefer a more well known animal. Although I still want to do this painting at some point. I thought about red deer bracing against winter blizzards and stoats in their ermine colours. But I decided upon the fox. There were 3 reasons for this: 

First a fox in it's winter coat is pretty stunning in the winter months and I remember seeing footage of one hunting through metre's thick snow in the TV documentary Yellowstone (you can find the clip on Youtube), secondly from a young age I loved foxes and even set up a little fox club and recruited everyone I could into it; and thirdly because I found a beautiful reference photo on MorgueFile that just worked really well with what I wanted to do.  This was to incorporate other seasonal aspects of nature: holly and ivy.


First job was to sketch out the fox and work on the positioning of some holly and ivy bush which the fox would be resting under. I sketched the image out in a muted blue so this would fit in well with the snowy background I was going to create.


Next I washed the background in a mix of blue and lavender tones to provide a base colour. I used a fan brush to allow for softer blending. This was left to dry so that a more opaque background layer could be created.


This more paint-rich layer was again softly blended. Greyer tones are also present to bring out the brighter areas that will be created on the fox and in the foreground later. Now it's time to add the leaves.


I added in some paler background leaves and branches. You can see the start of some darker leaves which I will spread out as well as berries and a trail of ivy leaves along the edge. 

These will be detailed in Part 2 this Sunday. Keep an eye out for the daily updates coming from then.

Wednesday 3 September 2014

Stone carving - Bast

Over the summer I finally got the chance to get going with an idea I had to create a Bast-like (also called Baast or Bastet) statuette out of soapstone. I drew out a little sketch last year of the kind of thing I wanted but the summer was wet and I had no idea where my stone carving tools were in the labyrinth that is our garage. I should say I'm definitely not a stone carver in terms of ability but I do enjoy creating things and working with other materials from time to time. Check out some proper soapstone artists using Google, you'll be amazed by the kind of things they create.
Soapstone is a very soft stone, you can even mark it with your fingernails, and its powder is what talcum powder originates from (its other names are steatite mineral talc). Unfortunately for me most of my soapstone tools remained AWOL during the carving and I had just one rasp so it was a slow process. Though thankfully they turned up for the sanding. Anyway onto the carving.
The first step was to find a stone of a suitable size, important as with carving you can only take away and not build up areas. I then drew a 2d design onto one of the stone faces which would act as a guide for me to carve to.
I then began to take away areas of the stone working roughly to the outline I made but giving myself extra room to sand and correct errors if necessary. It was important to move the stone around as I worked checking the lateral faces to make sure they were symmetrical. On the cat's right side I decided to let its tail wrap around along the foot. The design was styled based on ancient Egyptian relief's so my focus wasn't on realism but on angular forms and shapes. I created depressions between the front and hind legs on either side for when I would work the front of the stone back to create a gap.
I then began to shape the head, although it looks huge at this point, working on various angles to create the styled angular shape I wanted. I also worked on creating the 'collar' I put around the cat. You can see I started to roughly sand the legs on one side as well.
At this point I have cut away the gap for the legs and finished all the carving on the head to leave a roughly hewn statuette. Originally I was going to have an ankh symbol on the collar but my memory deserted me so I just made up this little design. It was time to do the sanding!

At this point you can see hints of the stone's colour beginning to emerge. There was a nice 'spotty' and 'stripy' pattern to it which goes well with the idea of a cat suggesting a serval.
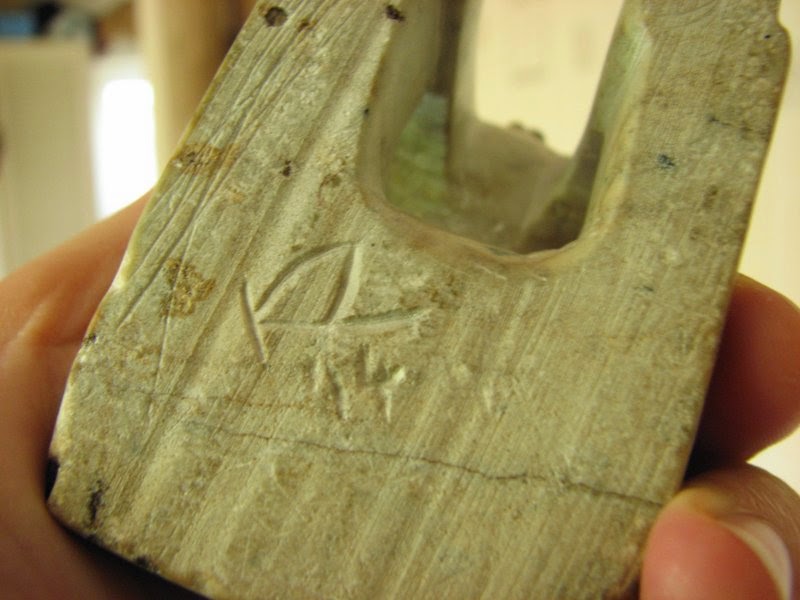
Wetting the stone gives you a great glimpse as to the colours of the stone and it is worth wetting a small area of stone at the selection stage sometimes if colour is going to be an important element of your sculpture. I sanded the carving again but this time with the stone wet and using a finer grit of sandpaper (I think it was 177 or similar). I then buffed it a little with a fleece and this really brought the colour to the carving when dry as well as quite a nice sheen. Using the end of a pair of scissors I added a little detailing around the eyes and collar and signed it on the underside.
Finally the soapstone tools turned up and I was able to use the very fine grit to sand as well as apply a little stone polish to finish (the camera is a little orangey here).
To give you an idea of size here it is in my hand. My sister came over to try out some carving as is making a little pyramid which would go really well with this, hopefully she'll have some time to work on it soon. It was fun working on it, I think I want to try something in relief next.