Over the summer I finally got the chance to get going with an idea I had to create a Bast-like (also called Baast or Bastet) statuette out of soapstone. I drew out a little sketch last year of the kind of thing I wanted but the summer was wet and I had no idea where my stone carving tools were in the labyrinth that is our garage. I should say I'm definitely not a stone carver in terms of ability but I do enjoy creating things and working with other materials from time to time. Check out some proper soapstone artists using Google, you'll be amazed by the kind of things they create.
Soapstone is a very soft stone, you can even mark it with your fingernails, and its powder is what talcum powder originates from (its other names are steatite mineral talc). Unfortunately for me most of my soapstone tools remained AWOL during the carving and I had just one rasp so it was a slow process. Though thankfully they turned up for the sanding. Anyway onto the carving.
The first step was to find a stone of a suitable size, important as with carving you can only take away and not build up areas. I then drew a 2d design onto one of the stone faces which would act as a guide for me to carve to.
I then began to take away areas of the stone working roughly to the outline I made but giving myself extra room to sand and correct errors if necessary. It was important to move the stone around as I worked checking the lateral faces to make sure they were symmetrical. On the cat's right side I decided to let its tail wrap around along the foot. The design was styled based on ancient Egyptian relief's so my focus wasn't on realism but on angular forms and shapes. I created depressions between the front and hind legs on either side for when I would work the front of the stone back to create a gap.
I then began to shape the head, although it looks huge at this point, working on various angles to create the styled angular shape I wanted. I also worked on creating the 'collar' I put around the cat. You can see I started to roughly sand the legs on one side as well.
At this point I have cut away the gap for the legs and finished all the carving on the head to leave a roughly hewn statuette. Originally I was going to have an ankh symbol on the collar but my memory deserted me so I just made up this little design. It was time to do the sanding!
At this point you can see hints of the stone's colour beginning to emerge. There was a nice 'spotty' and 'stripy' pattern to it which goes well with the idea of a cat suggesting a serval.
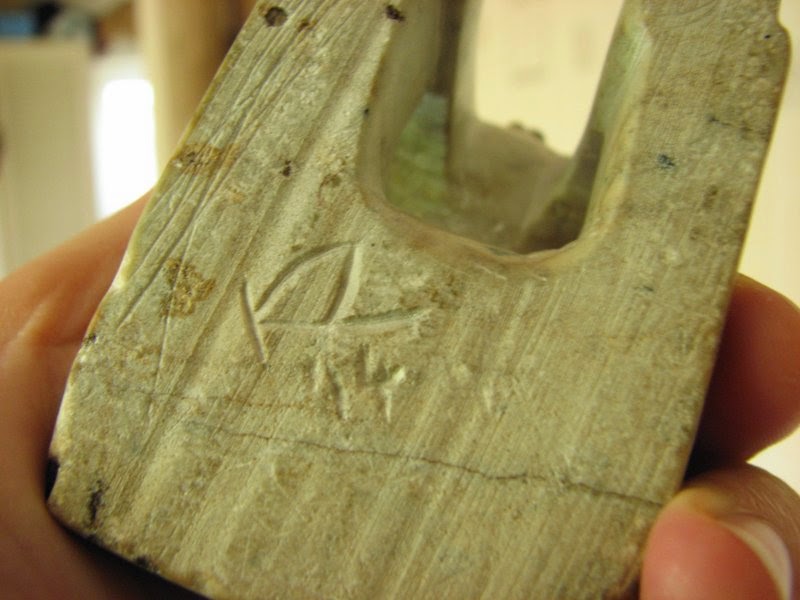
Wetting the stone gives you a great glimpse as to the colours of the stone and it is worth wetting a small area of stone at the selection stage sometimes if colour is going to be an important element of your sculpture. I sanded the carving again but this time with the stone wet and using a finer grit of sandpaper (I think it was 177 or similar). I then buffed it a little with a fleece and this really brought the colour to the carving when dry as well as quite a nice sheen. Using the end of a pair of scissors I added a little detailing around the eyes and collar and signed it on the underside.
Finally the soapstone tools turned up and I was able to use the very fine grit to sand as well as apply a little stone polish to finish (the camera is a little orangey here).
To give you an idea of size here it is in my hand. My sister came over to try out some carving as is making a little pyramid which would go really well with this, hopefully she'll have some time to work on it soon. It was fun working on it, I think I want to try something in relief next.
ban.jpg)


res.jpg)

No comments:
Post a Comment